“We’ll have to use the winch”, Cupcake declared.
“Really?”, I thought to myself. All I really need is for one of you to actually “try” to ground guide me and perhaps to engage the lockers. This doesn’t need a winch.
But, for the first time in a long time, I wasn’t in charge and I certainly wasn’t interested in being in charge. So, we’ll use my new winch and see how it works. It actually sounded like fun and I probably needed test of the system. But then, I realized that my recovery gear was “buried” in the back of the Jeep. Which was almost knee deep in the icy water. “Shit!”. I thought.
It was dark. We had just spent 7 hours travelling slowly down a “road” so overgrown and forgotten that the ATVs had a tough time. Snow was falling on this early November weekend in the Algoma Highlands. We were actually looking at taking another 3 – 7 hours to get back out. This is my kind of situation.
I inquired if anyone else had a bow clevis. Cupcake had a small one – which didn’t fit in the winch end. “Shit”, I thought again.
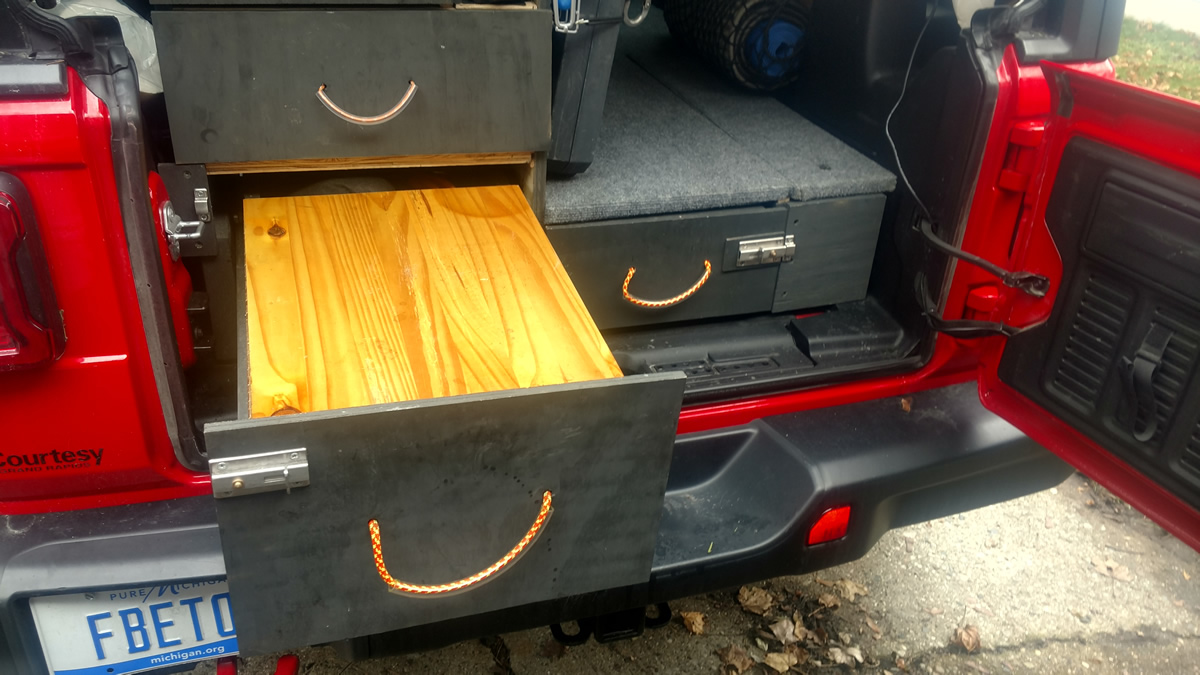
Cougar was very kind to offer to wade in the the icy water with her muck boots, open the back gate and retrieve a bow clevis from the under-floor storage of the Jeep JL. This involved removing a heavy drawer and digging under the sleeping platform. She did it, but I was already thinking that my recovery gear needs to be more accessible.
In the video of Clifford, this is the location where it all happened – 4 hours later – in the dark.
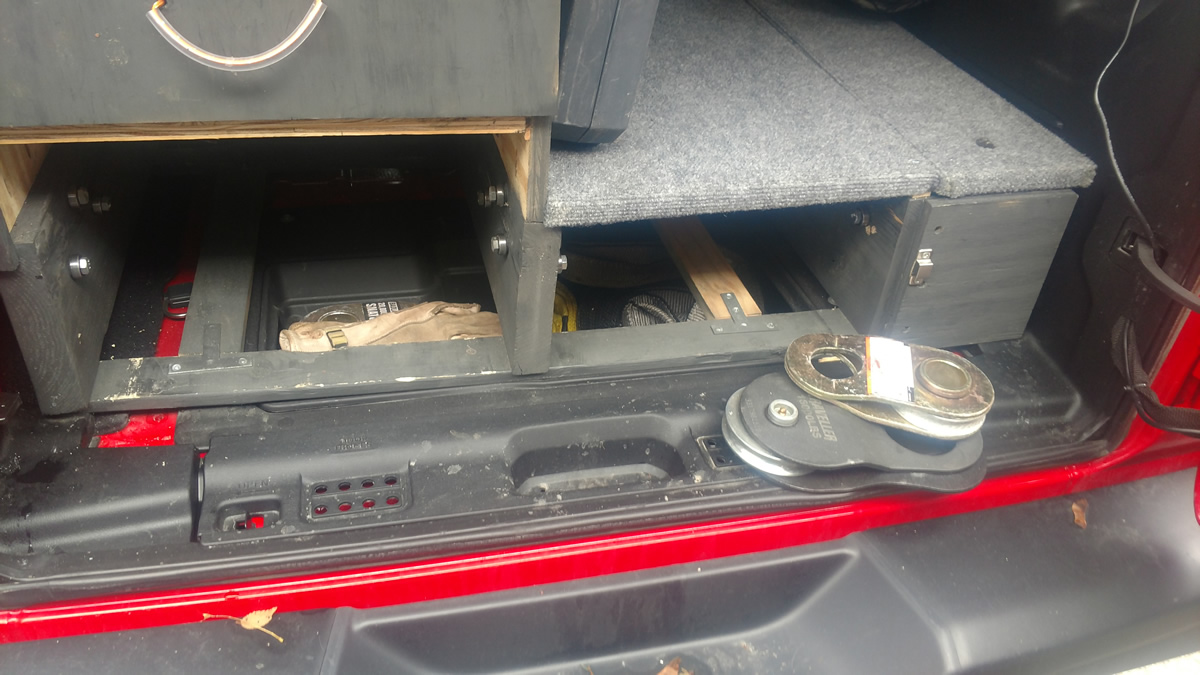
Storage in some overlanding rigs is at a premium. While the Jeep “Clifford the Red” has lots of storage, some of that storage is “deep”. The storage compartment in question was under the rear floor of the Jeep, which has a custom sleeping platform built over it. The recovery gear was hidden away (straps, clevises, chains, pulleys, etc.) in this deep compartment. So, it took some time to access.
Normally, I access recovery gear to help others in recovery. This time, it was me and it took some inefficient effort to access it. Which led to rethinking of my recovery gear storage. The deep storage of this under-the-floor compartment is more suitable for spare fuel for the stove, extra wool blanket or perhaps other things that would need to be accessed occasionally on a flat, level and dry surface. Recovery gear, on the other hand, is often needed when buried in a water feature or ditch.
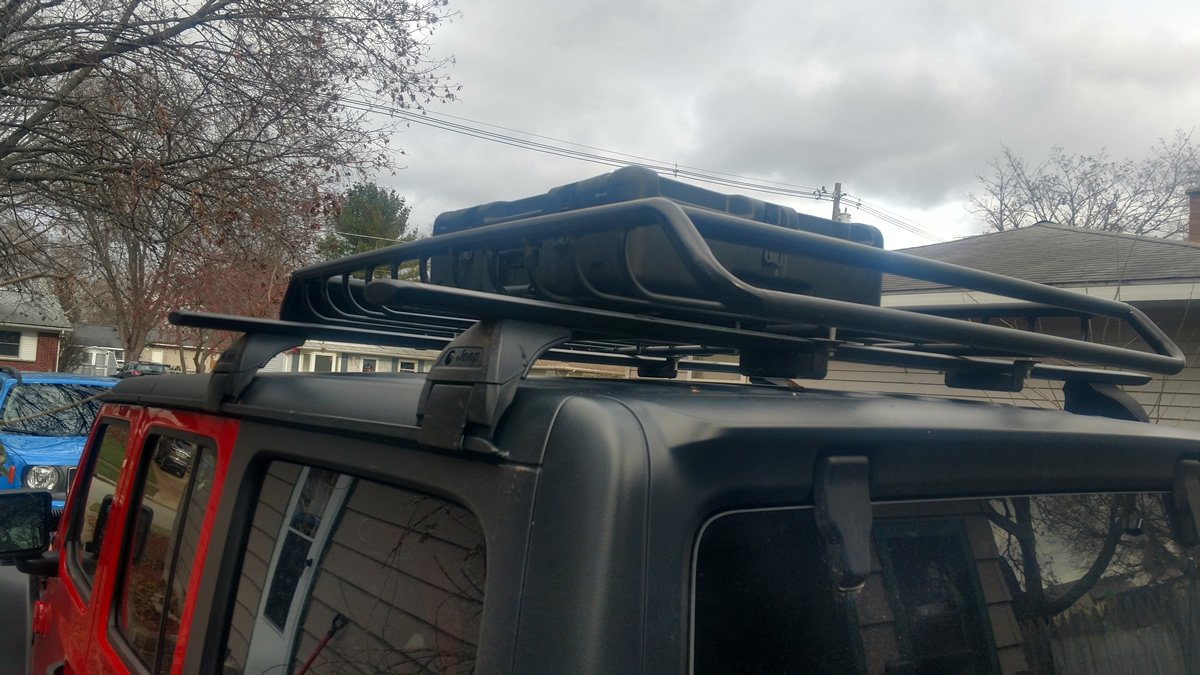
Enter “external storage”. Storing recovery gear on the outside of the vehicle and in a “high” place is probably the best option. Stealing a concept from the military, who keeps their “pioneer kit” on the outside, I started looking at options.
One of my standard overlanding storage options is a roof rack. I like the concept and usefulness of a roof rack. While it isn’t often needed on weekend trips, it offers ample extra storage for a lot of gear on extended trips and serves well for “overflow” gear. I have often used a roof rack for a “spare-spare tire”, kayak, extra food, etc. It is high and easy to get to, even when stuck in a river crossing. The disadvantage of a roof rack is that it is “outside” and subject to the elements.
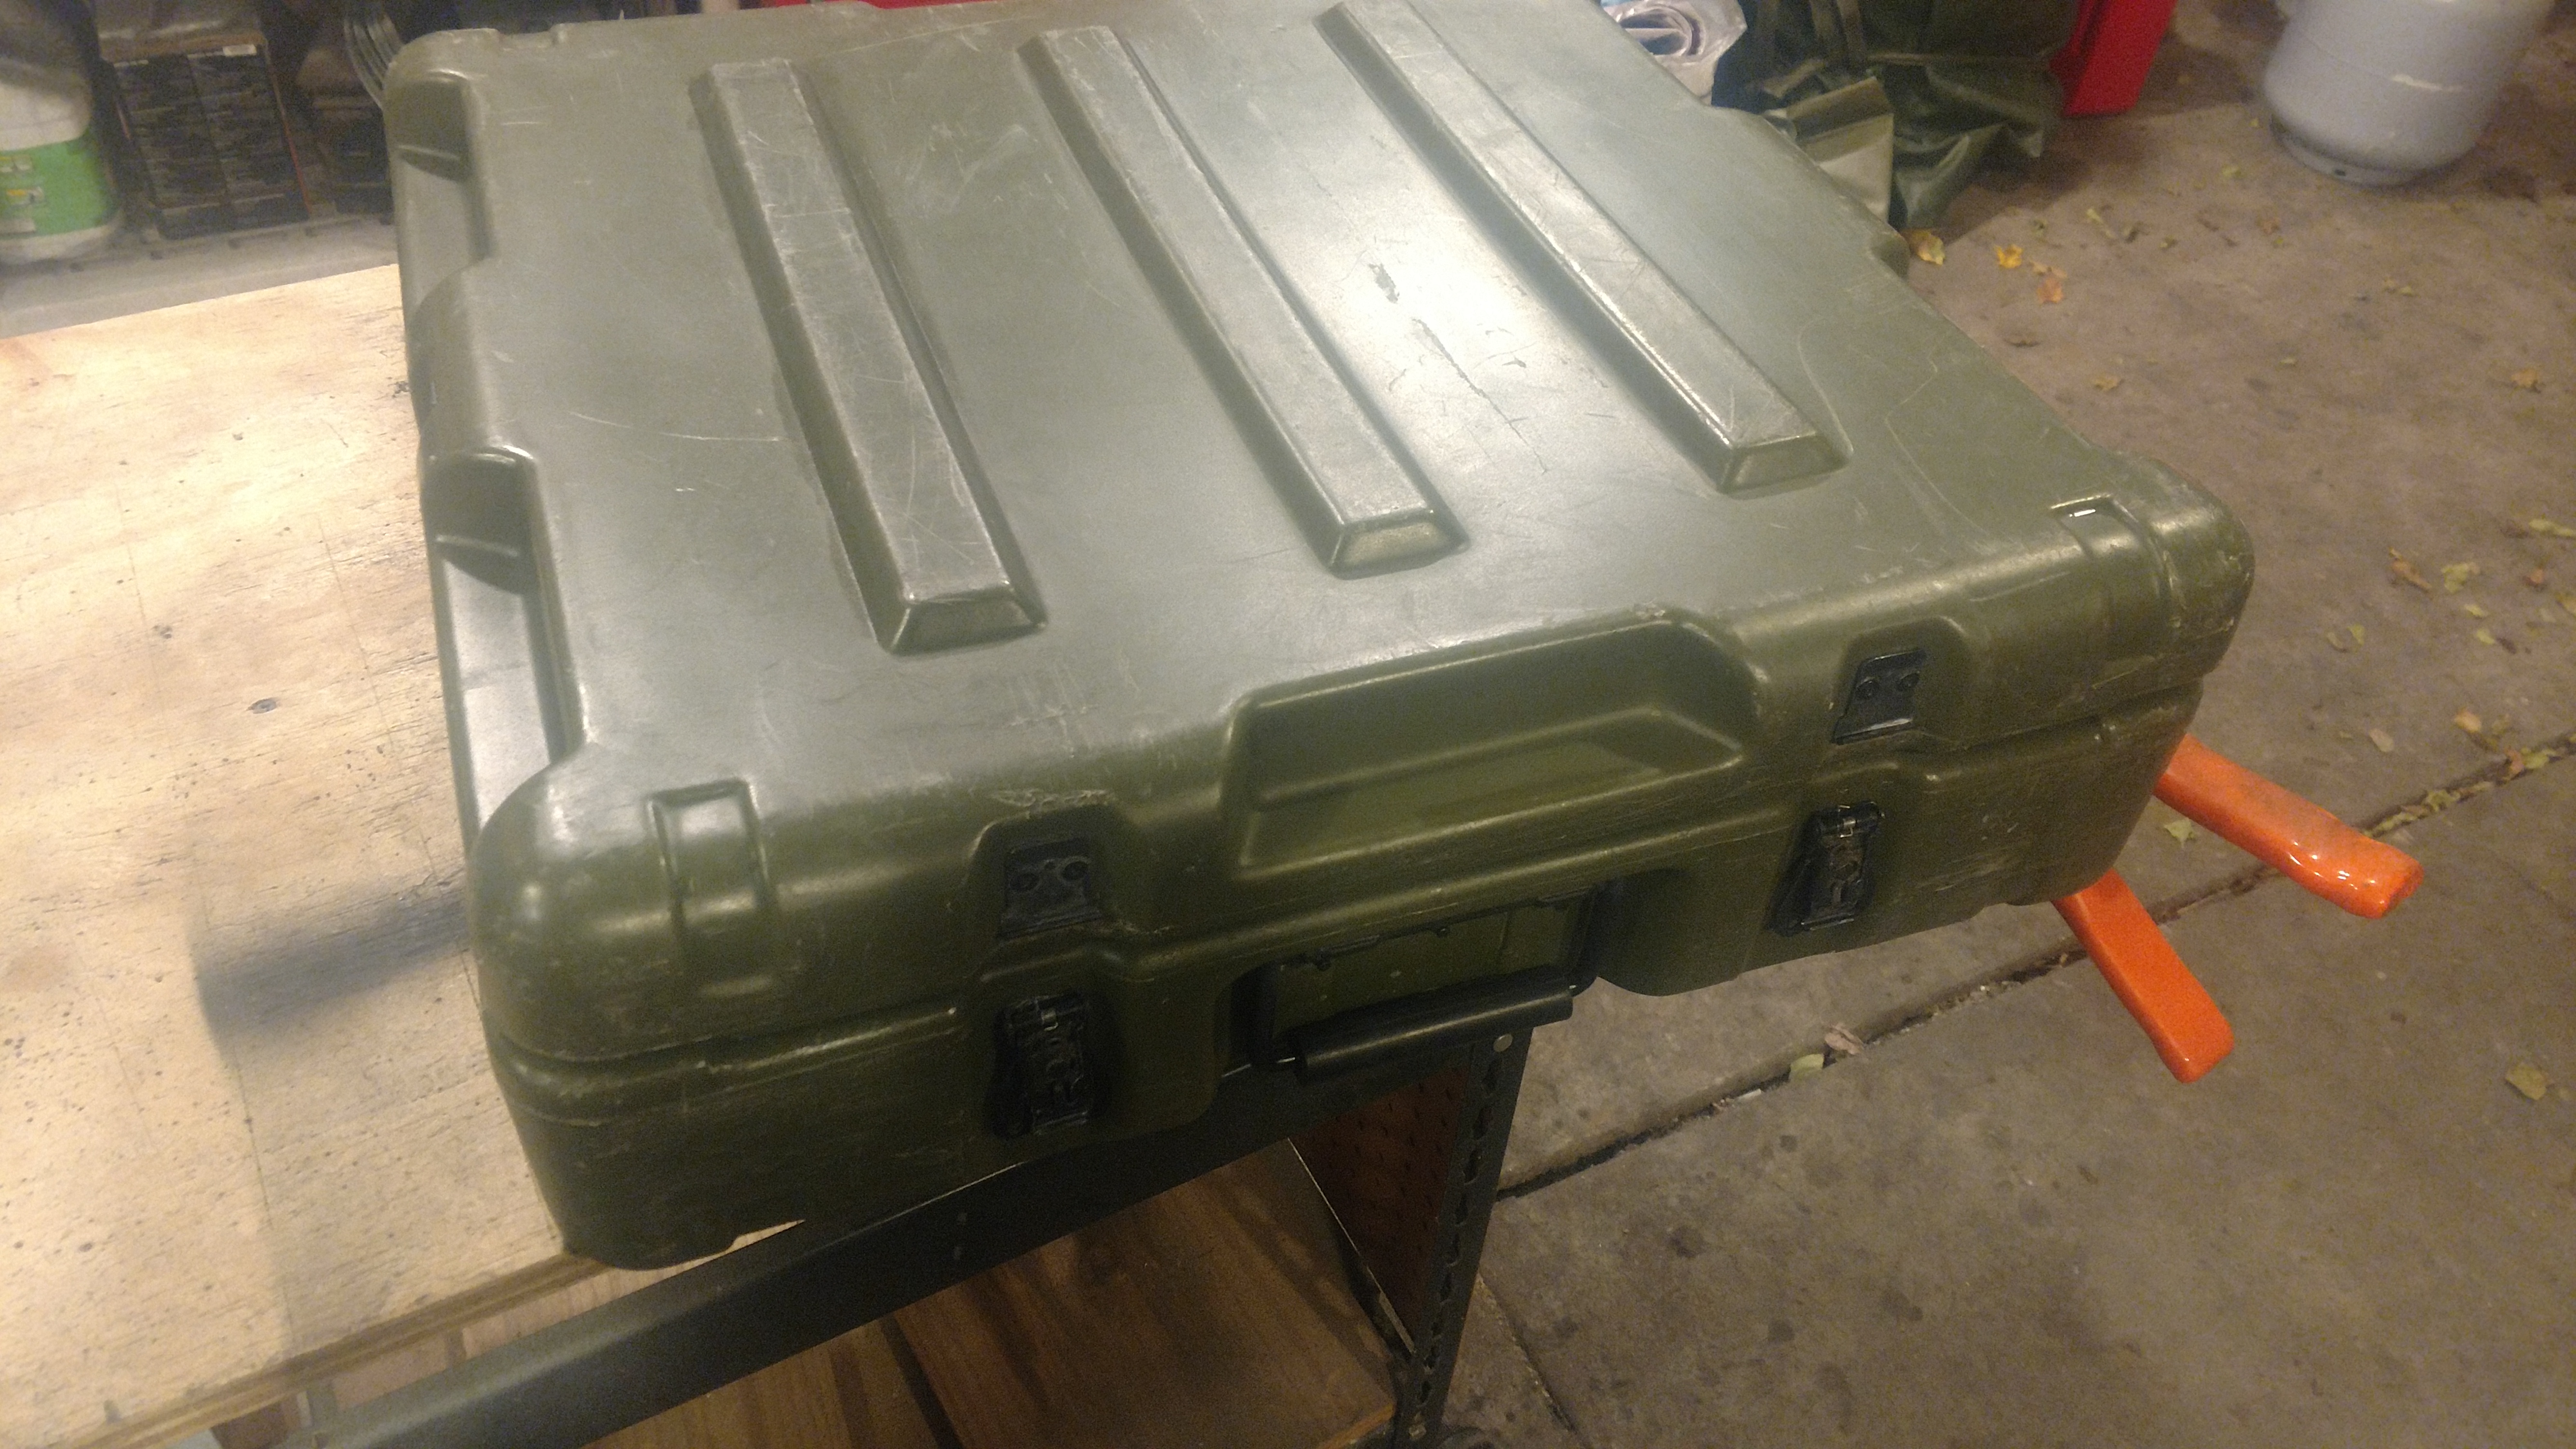
To eliminate the “elements” I utilized another military concept – the transport case. Transport cases come in all shapes and sizes in the military. They carry medical supplies, weapons, electronics and anything that shouldn’t be exposed to the elements and transported in harsh conditions. Civilians sometimes call them a “Pelican Box”. And they are Expensive. A little case that might hold a lunch and handgun goes from $70-$100. A case with a low profile, square shape – like the one I was in search of – would retail for well over $150.
Instead of new, I opted for surplus. I visited “General Jim’s” surplus in Clare, Michigan. I had remembered that they had stacks of cases for less than half the retail price of new ones. I found two cases that fit the bill for less than $40 each. I snapped them up. Here is how I made a roof rack storage bin for less than $80 ($60 by using scrap in the garage).
Supply List
Case $38
Stainless steel fasteners $8
Paint, Spray, Flat Black $6
Flat Aluminum Stock $12 (Scrap already in Garage)
Flat Steel Stock $7 (Scrap already in Garage)
Step 1
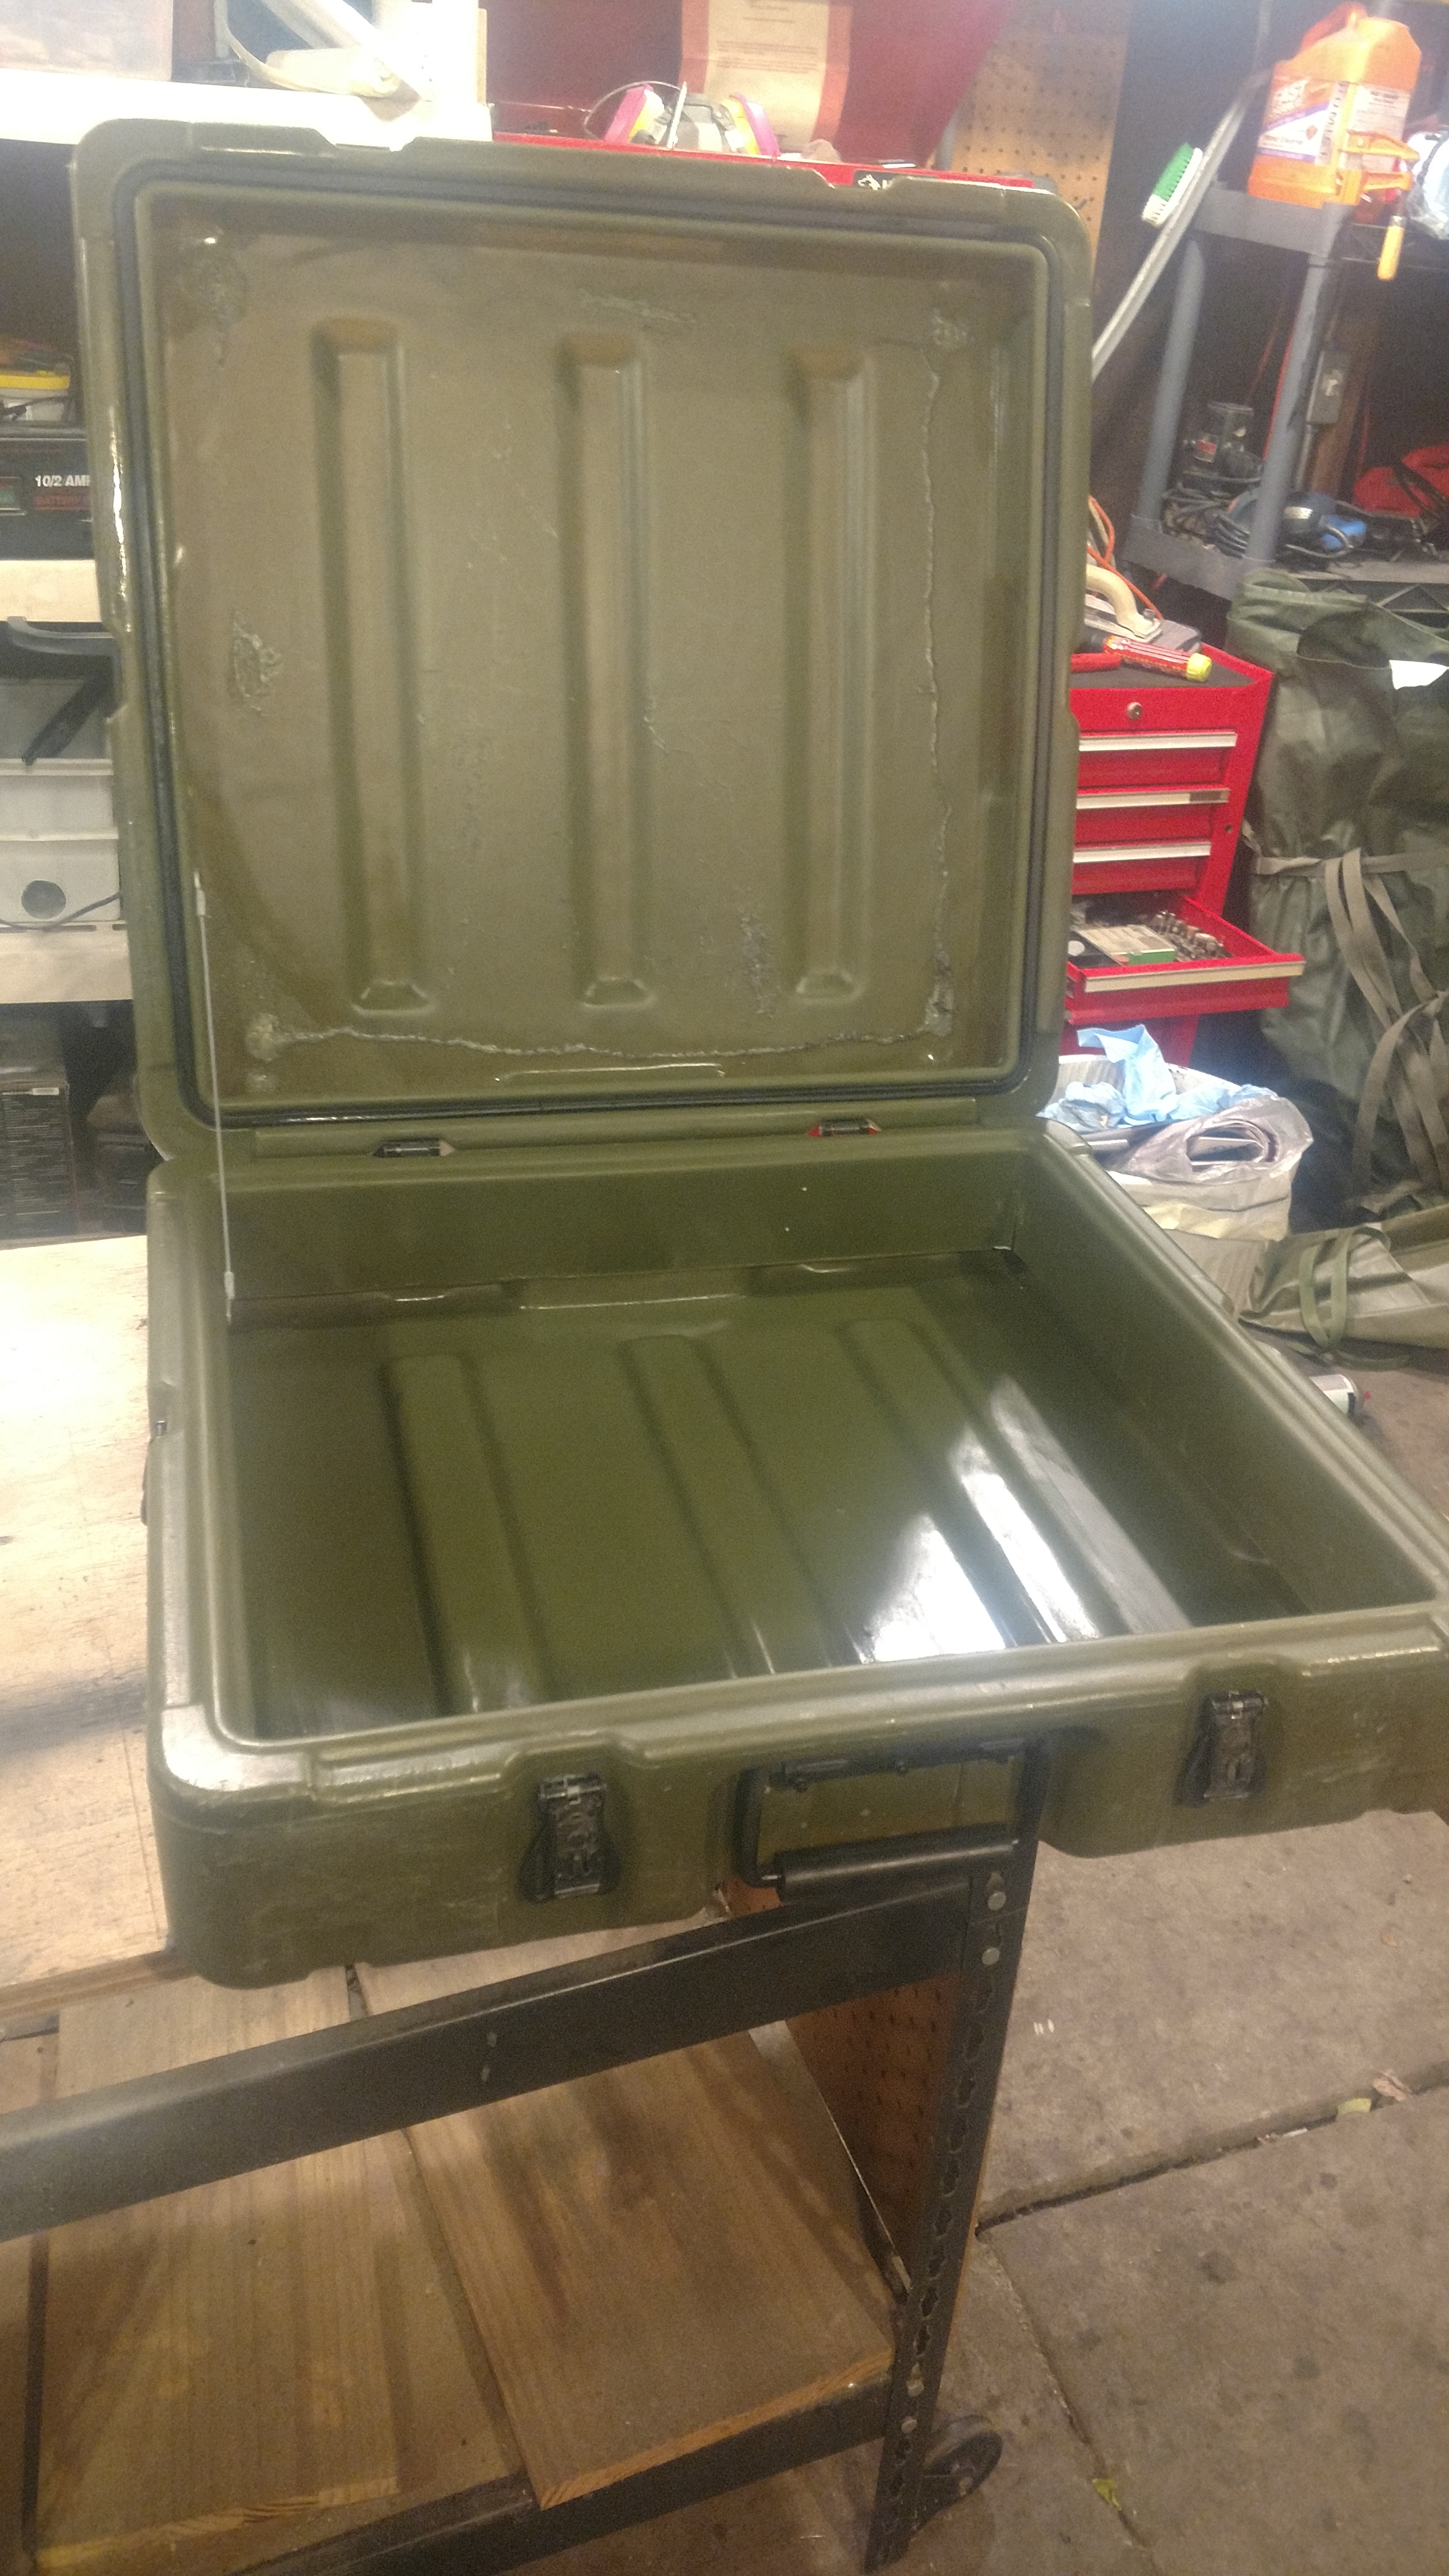
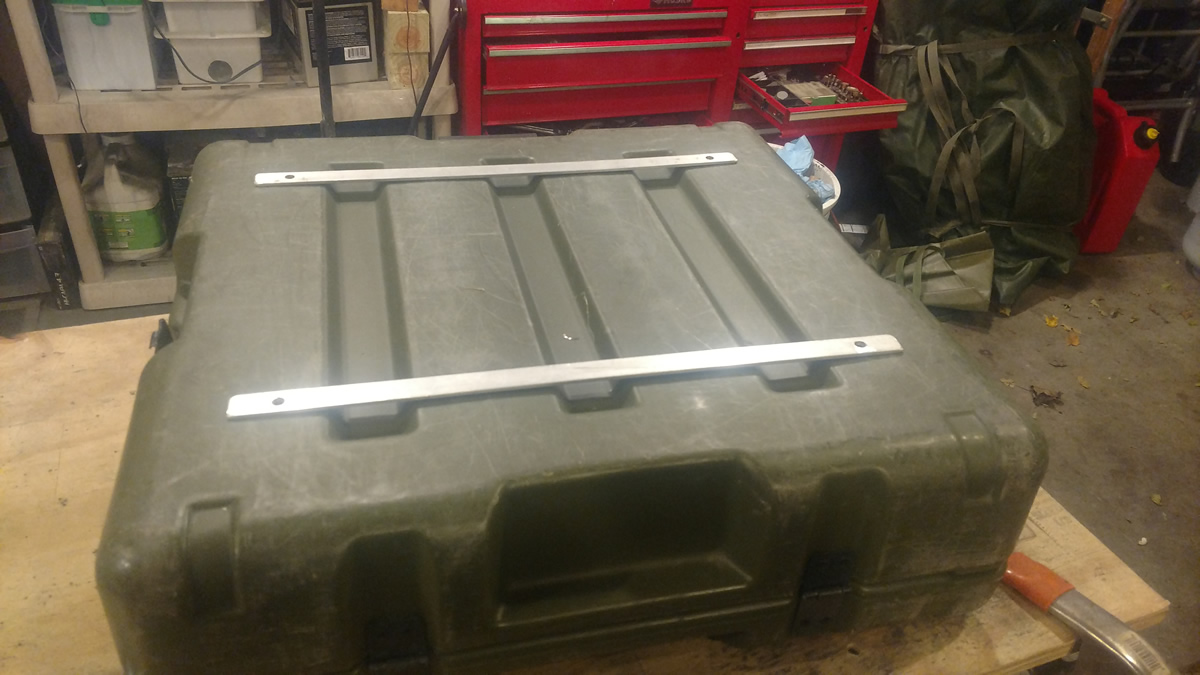
Clean the case to remove all the dirt and residue from previous foam packing material. Ensure the rubber seal is still serviceable and reactive (rubbery). If the seal is dry, you can try some silicone lubricant. Repair and lubricate the latches, if needed. This particular “Hardigg” case came with four butterfly latches. These latches could also be plasti-dipped for easier use. (click on pictures to enlarge)
Step 2
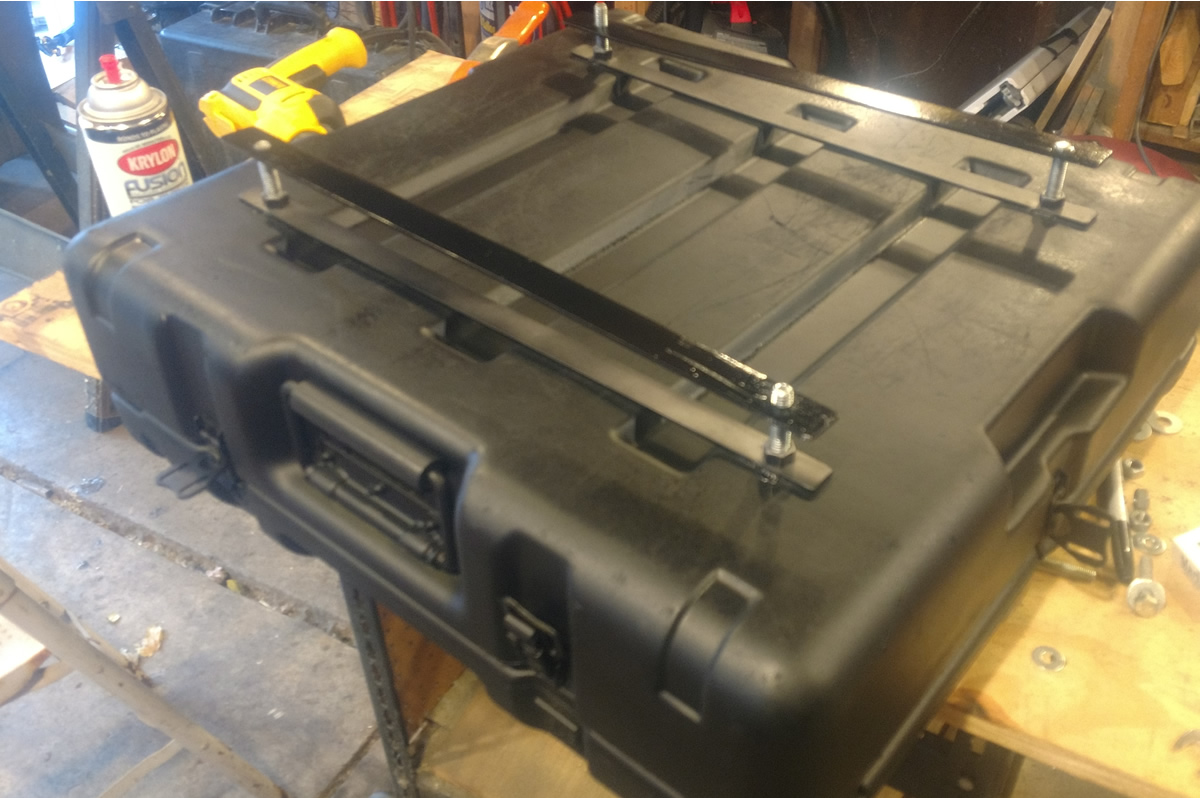
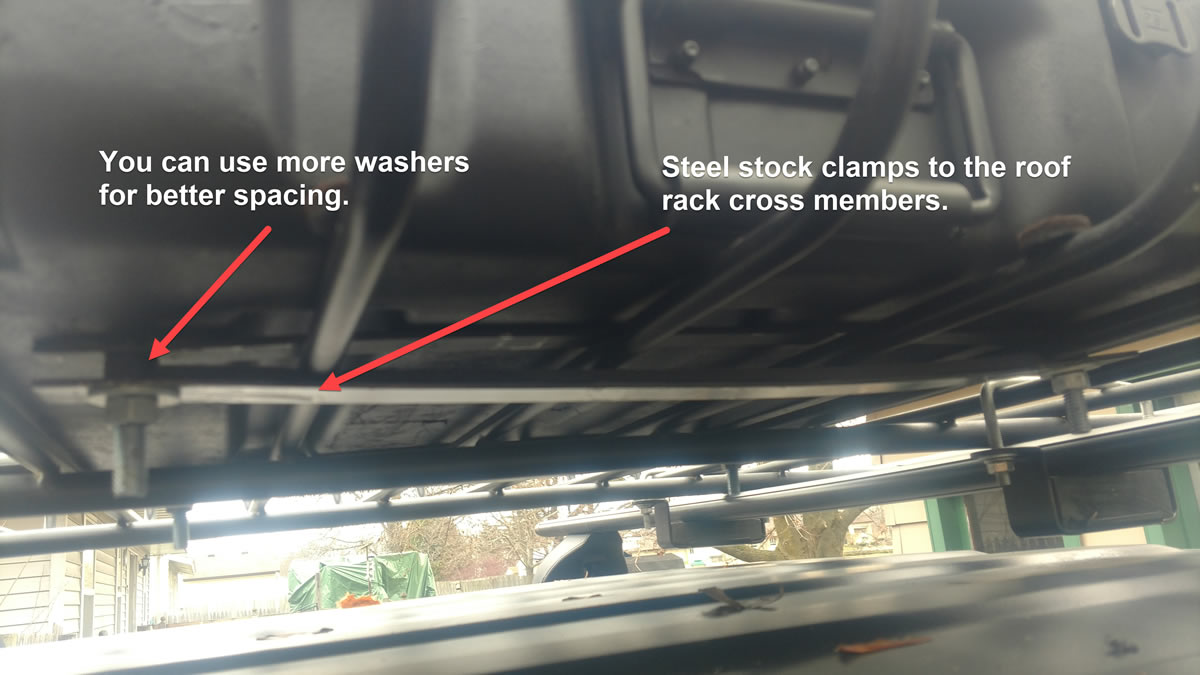
Cut two aluminium strips to act as runners. Drill holes for 3/8″ or 5/16″ bolts. Use the holes you drilled in the aluminum as templates to drill holes in the box. These runners will allow for a strong attachment to the roof rack. They also protect the plastic case from “rubbing” on the steel roof rack cross members.
Step 3
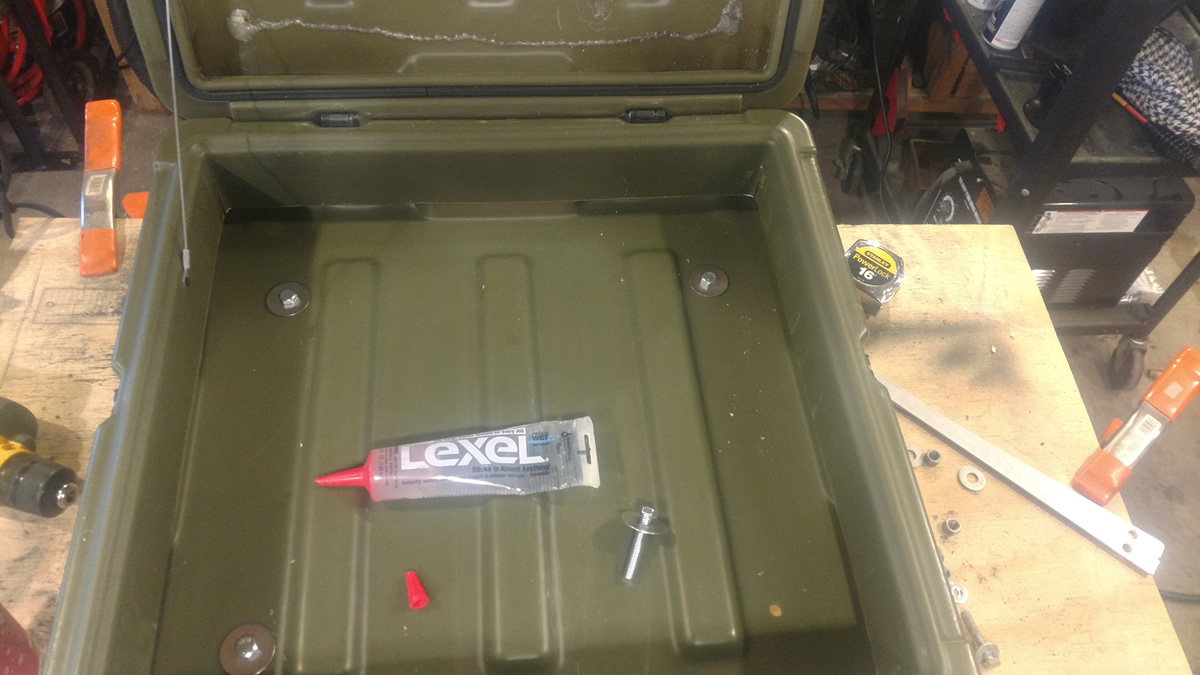
Choose bolts that are long enough to extend through the roof rack cross members, the flat steel and to add another washer and nut. Using a waterproof sealer (silicone or synthetic rubber elastomeric sealant like Lexel), caulk the bolt heads and washers on the inside and around the bolt where the runners will be attached. This keeps the waterproof integrity of the box. I’ve used Lexel to seal kayak bulkheads and it seems to be a superior adhesive/sealer to silicone. Use large diameter washers (like fender washers) on the inside to insure the bolts won’t pull through under extreme loading.
Step 4
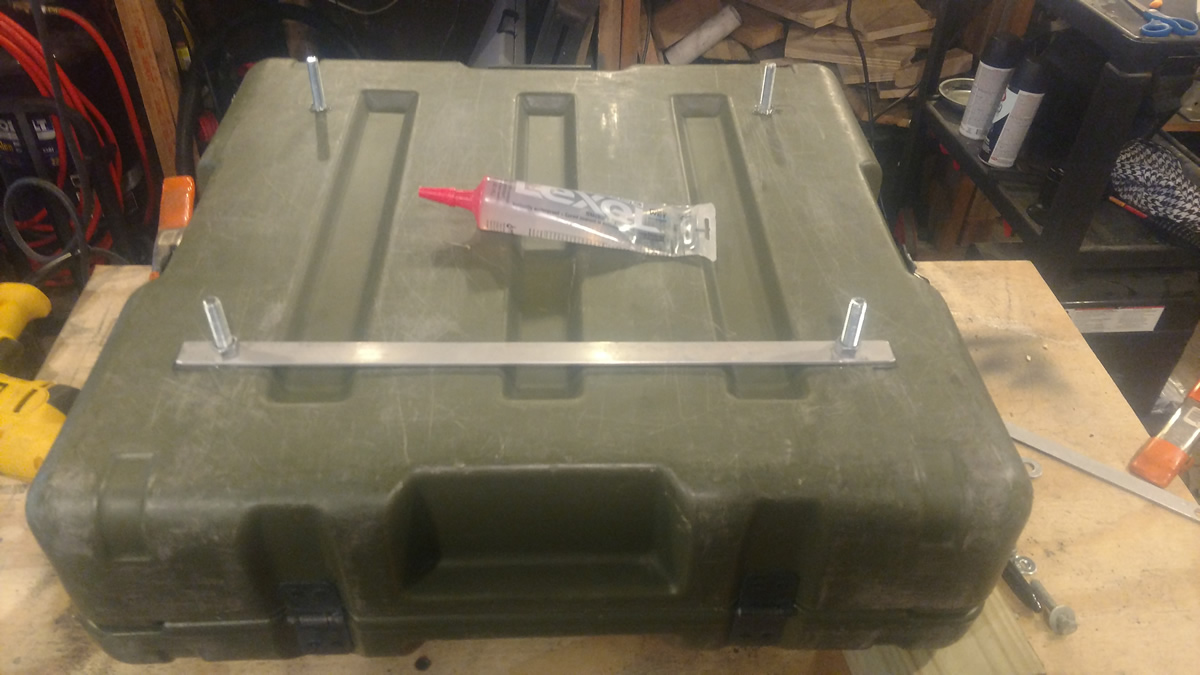
After sealing the bolts and washers, secure the runners with a nut for each bolt on the bottom. Tighten firmly.

Step 5
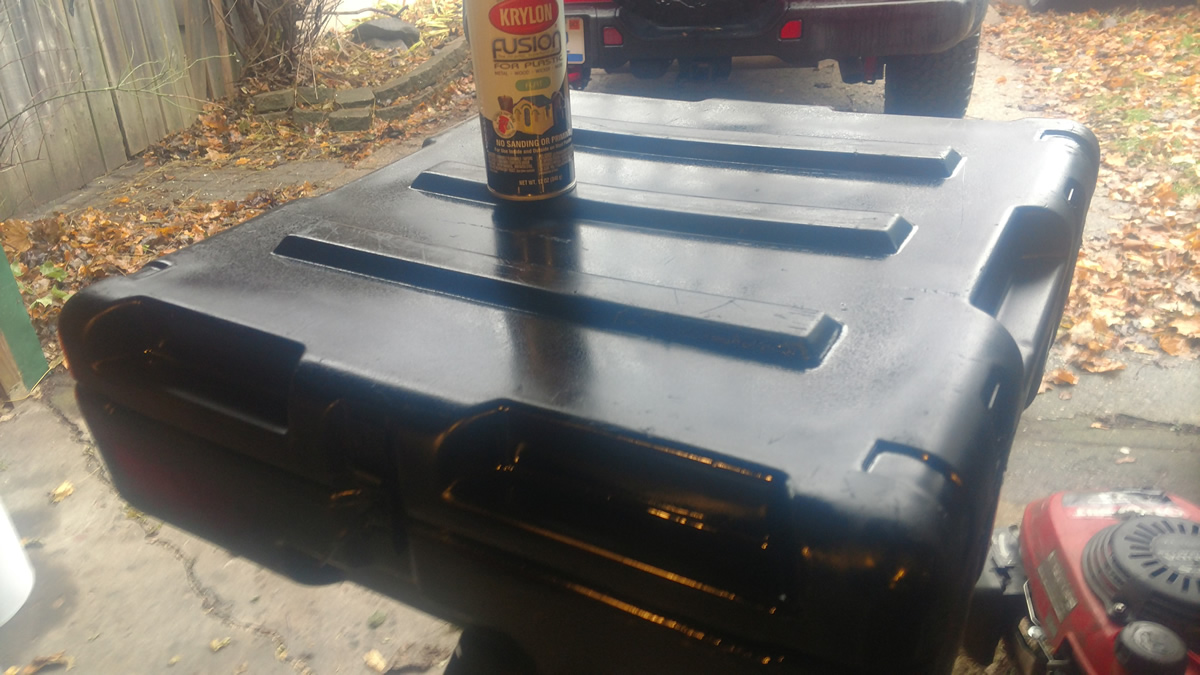
Paint the case with your choice of color (If you don’t like the case color). I chose flat black to match the roof rack. I used Krylon Fusion paint, which is formulated for plastic. Prepping plastic for paint is very important. First, it should be a clean surface – clean it good. Some use soap and water, I used Windex (ammonia based). Second, if the plastic is smooth, it is important to “rough it up a little” with some fine (very fine) grit sandpaper. Being a used case, it had plenty of roughing up. The paint adhered to the case very well.
Step 6
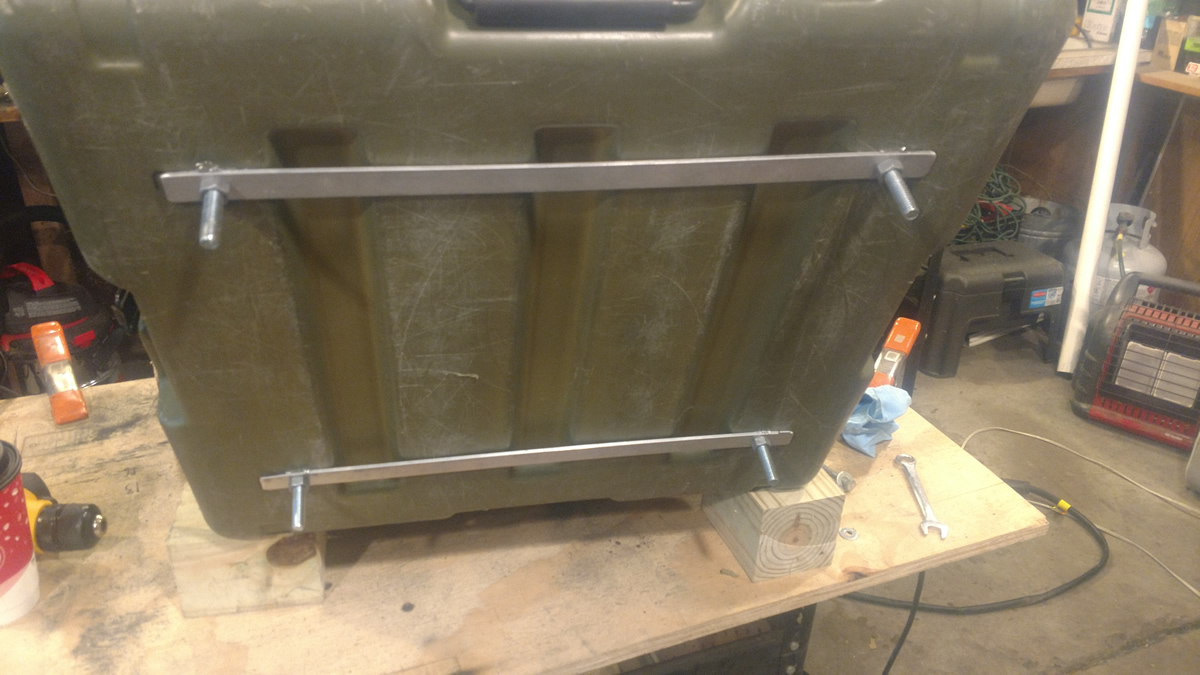
Drills holes in the steel flat stock that match the bolts. This steel will be used to “clamp” to the cross members of the roof rack. Clean the steel well removing all grim, rust and dirt. Then paint to prevent rust.
Step 7
Using the flat steel as a “clamp”, place the box on the roof rack, install the steel on the bottom with stainless steel nuts and washers. If you prefer the steel didn’t bend when you tighten the nuts, you can add washers as spacers.
Finished.
That’s it. This is an exceedingly simple project. There are also a lot of variations that you can consider that will fit your specific needs. The project shows that we shouldn’t be limited by space “inside” our vehicle. For a small sum, we can creatively add a lot of suitable storage space to the outside.
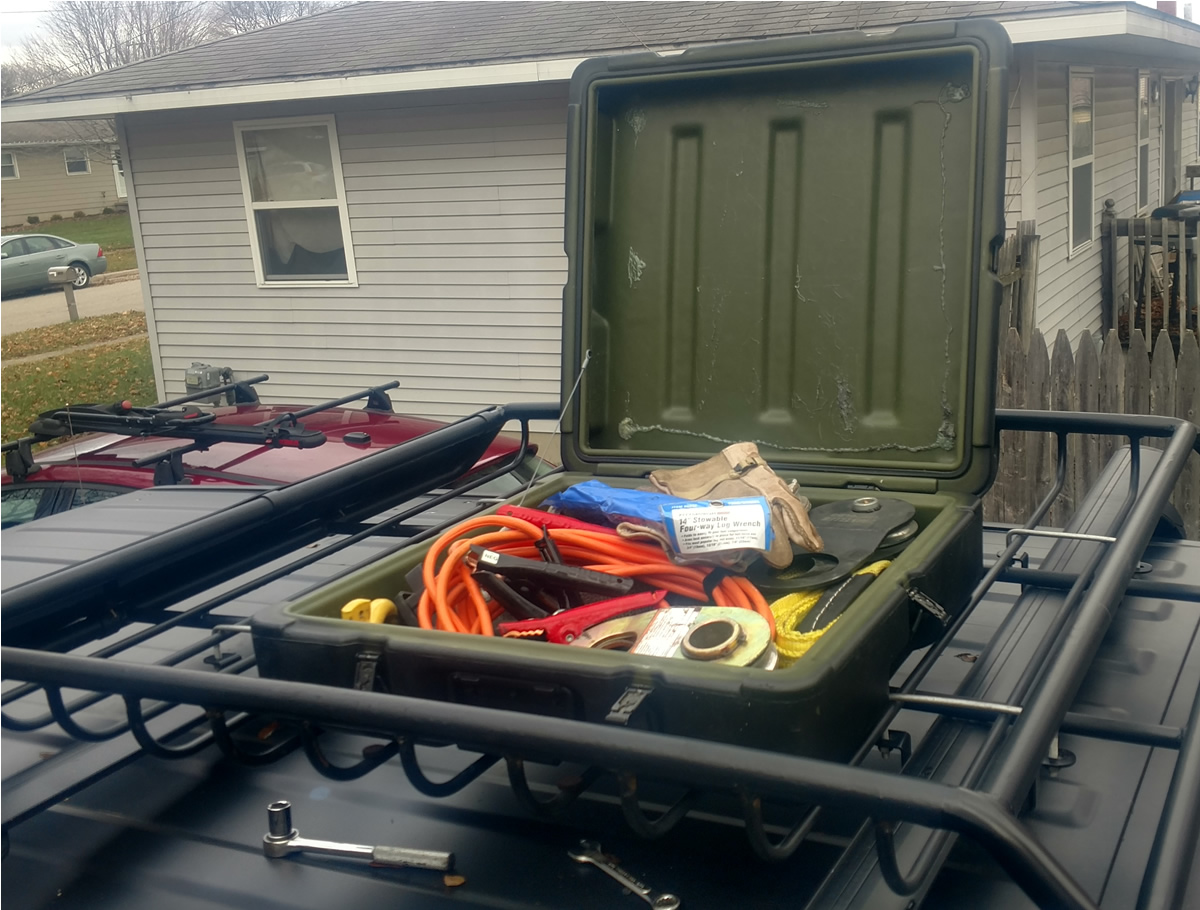
As you can see from the picture, this case will hold my recovery gear and some bonus storage (jumper cables, gloves, folding tire iron). As important, this gear can easily be accessed when the Jeep is stuck in snow, mud or water. I just stand on the rear tire, open the case and get what I need. It seems to be a great solution.
Now, I can spend some time deciding what can go in the deep storage compartment. Right now, a bottle of whiskey has been placed there. In my case, it doesn’t take a lot to access this space, but it should be items that would normally be accessed while the vehicle is on a flat, dry surface.
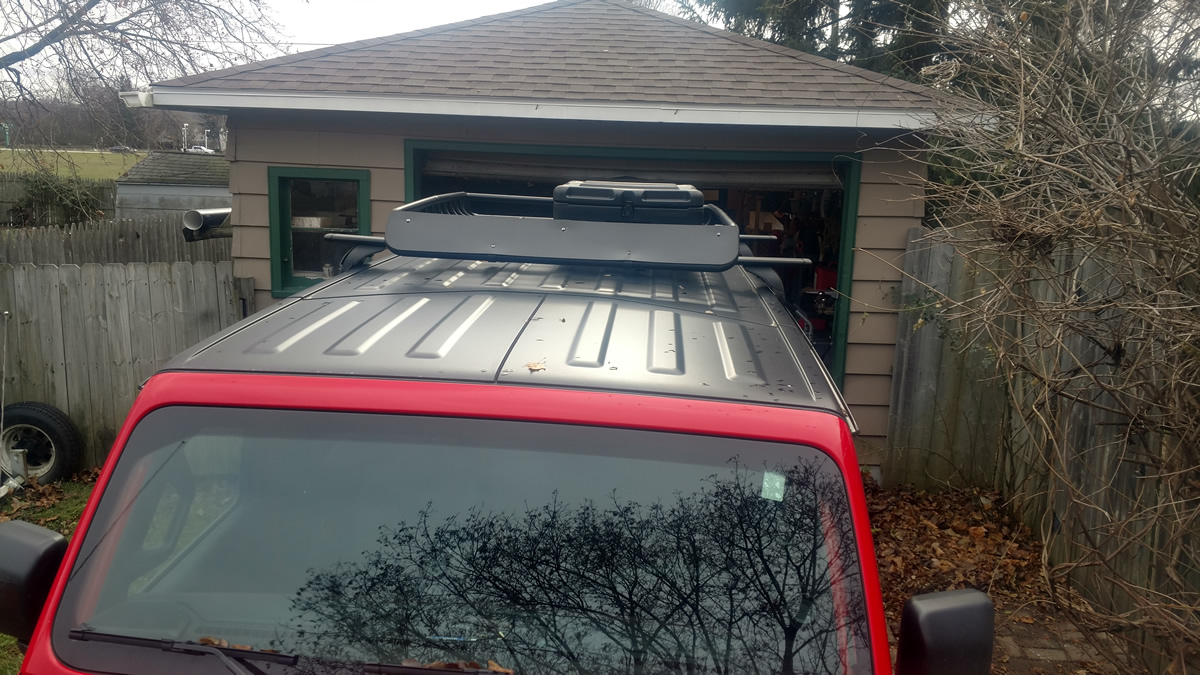
The profile of the transport case is low. SInce the roof rack already offers wind resistance, the solution will do little to affect current gas mileage. To be sure, a trip to Labrador and Newfoundland this year proved that my Jeep’s gas mileage (with a roof rack) was still about the same as the other vehicles travelling in the lineup. That was at regular highway speed (55-60mph) – at Freeway Speeds (75-85mph) gas mileage drops on a steeper curve.
Does that case take up needed roof rack room?
Yes, it does. But, normally gear that is stored on the roof rack can be easily secured around and on top of the box. Gear for the roof rack is normally stored in smaller waterproof cases or dry bags. These can all easily fit with the box.
Thoughts? Suggestions? Please feel free to comment below.

